Executing Commands
Individual Commands
At any time you can click on a command to have it start executing.
When you click the “Top Level” combo box, it will allow you to drill down to indivual command definitions. At these leaf nodes you can modify your command before executing it.

Command Sequencer
The command sequencer lets you chain together commands so you can execute a string of commands. This is the sequencer:

Some of the symbols you will see in the sequencer:
🗑️ - click to delete the entire sequence, drag-n-drop a command onto it to delete that command
▶️ - runs the sequence
⨉ - cancels the sequence
♻️ - resets the sequencer state
→ - when placed in the command list, causes all future commands to run sequentially
⇶ - when placed in the command list, causes all future commands to run in parallel
Construct sequences by dragging commands into the sequencer area.

When you hit ▶️ your sequence will begin. As the commands complete the sequencer will update showing overall progress.
Once your sequence finishes (successfully or not) you will need to hit the ♻️ to return it back into a runnable state. When the sequence fails it will show you where in the sequence it stopped.

Commands with Role of type Sequence behave differently when clicked on an dragged into the Sequencer. When dragged they will fill in the sequencer with their commands.

Other operations:
You can re-order elements of the sequencer by click-dragging them.
You can delete elements using middle-click, by dragging to somewhere else (command area or 🗑️), or by clicking the 🗑️ button to delete them all
Command Output Tabs
When you run commands, a new Command Output tab opens. In the Output you will see whatever logs come out over stdout and stderr as well as comments from AutoBonk ([Bonk]) indicating stuff that it is doing.
Output: All output including AutoBonk logs related to the execution of the command
Warning: Output that gets categorized as a “warning” (custom text parsing algorithm in AutoBonk)
Error: Output that gets categorized as an “error” (custom text parsing algorithm in AutoBonk, and
stderroutput)
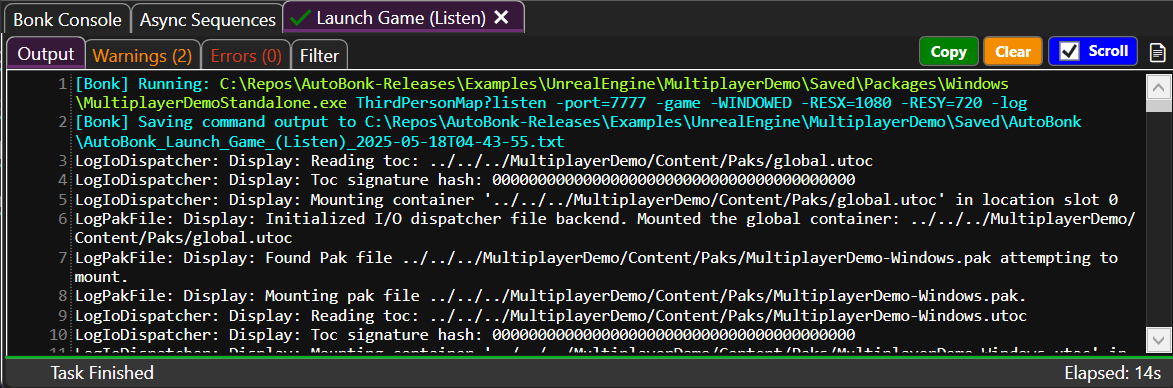
You can Copy the currently selected log (Output, Warnings, Errors) to your clipboard
You can Clear the current log
While you are running a command you can Cancel the task
You can change Scroll behavior as new output emits from the command
You can access the Log 📄 and drag-n-drop it to another app (such as Slack). See tooltip for more information.
You can use Ctrl+F to find text in the log quickly.
Certain paths (Unreal, file paths) become links you can Ctrl+Click on to navigate to them. (Documentation TODO: Unreal link clicking)
Loading External Logs
You can drag and drop log files into AutoBonk for automatic warning and error parsing. This is a great way to take a log from a different context (from another coworker, from a server, etc.) to quickly parse through what is going on.
Command Server
AutoBonk is able to make its commands available via a local web server on localhost. By default the command server starts at http://localhost:5332/. For interacting with a local Docker image, http://localhost:5333/ exposes a proxy server that can be used in addition to the command server.
Under Options > Settings you can modify the command server settings. Options > Start Command Server and Options > Start Reverse Proxy Server to manually create turn on the servers.
To test your server is running correctly you can check: GET http://localhost:5332/api/test.
All commands in a workspace are available to be executed. Arguments to your command can be specified a couple ways:
Submit a
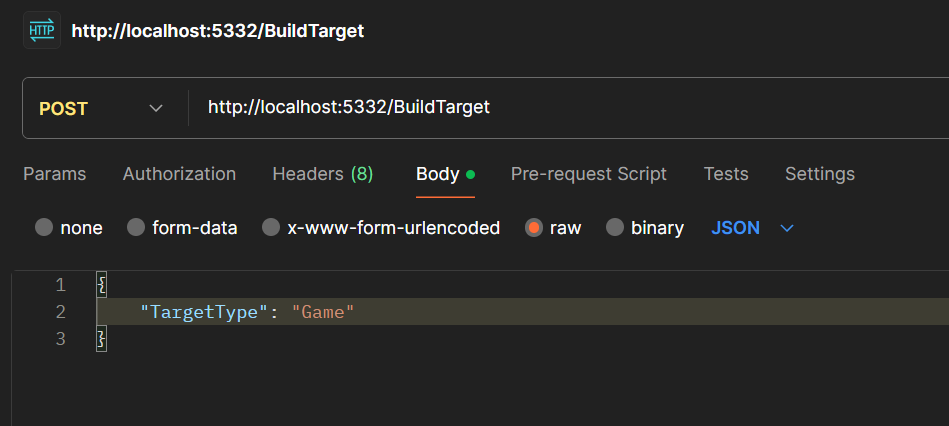
POSTtohttp://localhost:5332/DisplayNameNoSpaces. Set your content type toapplication/jsonand make the body of your message JSON, where each member represents the value of the variable you want to set. You can use Query Parameters (?VarName=Blah) if your arguments are simple and short. One query parameter may specify?VarName=__USE_RAW_BODYin which case the Body of the message can be an arbitrary string that the variable will assume the value of.If you don’t need to set arguments, you can submit a
POSTtohttp://localhost:5332/api/run?Commands=Command1,Command2,Command3to run the commands namedCommand1,Command2, andCommand3. Your commands’ Display Name cannot have spaces in their names.
As mentioned in (1) above, for any given command, you can specify a command server route by editing the advanced field Custom API Route. If you enter /foobar in this field, then you can execute the command by POST``ing to ``http://localhost:5332/foobar.
Example of using Postman to interact with the command server.